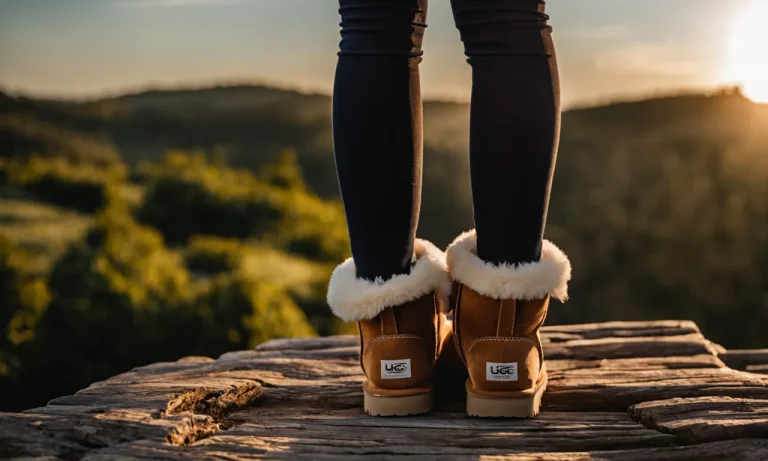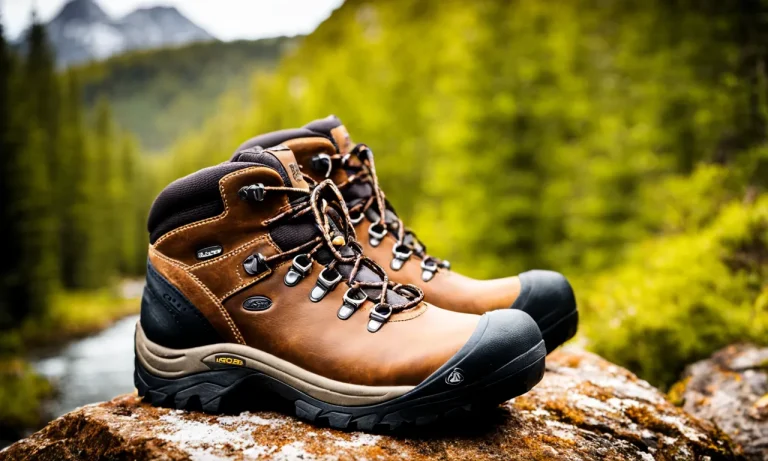
Getting a new pair of hiking boots can be an exciting experience. The sturdy leather and rugged treads make you eager to hit the trails right away. However, brand new hiking boots can cause painful blisters and hot spots if you don’t properly break them in first.
If you’re short on time, here’s a quick answer to your question: Wear your new boots around the house for short periods, gradually increasing the time you wear them. Go on short, easy hikes before longer treks. Use moleskin and thick socks to prevent blisters.
But there’s more to learn about properly breaking in hiking boots to maximize comfort and durability.
In this comprehensive guide, we’ll cover everything you need to know about breaking in hiking boots. You’ll learn tips and tricks from expert hikers and gear specialists for getting your footwear ready for the trail.
Why Breaking in Hiking Boots Matters
Breaking in hiking boots is an essential step in ensuring a comfortable and enjoyable hiking experience. While it may be tempting to lace up your new boots and hit the trail right away, taking the time to properly break them in can make a world of difference.
Here are a few key reasons why breaking in hiking boots matters:
Prevent pain and blisters
One of the main reasons to break in your hiking boots is to prevent pain and blisters. New boots often have stiff materials and tight spots that can rub against your feet, causing discomfort and blisters.
By gradually breaking in your boots, you allow the materials to soften and mold to the shape of your feet, reducing the risk of painful friction.
According to the American Hiking Society, wearing your boots for short periods of time before embarking on longer hikes can help your feet adjust to the boots and minimize the chances of developing blisters.
Additionally, using blister prevention products, such as moleskin or blister pads, can further protect your feet during the break-in process.
Improve fit and comfort
Breaking in your hiking boots also improves their fit and overall comfort. Just like a new pair of shoes, hiking boots need time to conform to the unique shape of your feet. By wearing them gradually and allowing them to mold to your feet, you can ensure a better fit and reduce discomfort during your hikes.
It’s important to note that everyone’s feet are different, and what works for one person may not work for another. Experimenting with different lacing techniques, adding insoles for extra support, or using specialized socks can also help improve the fit and comfort of your boots.
Extend longevity and performance
Properly breaking in your hiking boots can also extend their longevity and improve their performance. By gradually wearing them, you give the boots a chance to adapt to your feet, reducing the risk of premature wear and tear.
This can ultimately extend the lifespan of your boots and save you money in the long run.
In addition, breaking in your boots allows you to identify any potential issues or discomfort before embarking on longer hikes or backpacking trips. This gives you the opportunity to address any fit or comfort problems early on, ensuring that your boots perform at their best when you need them the most.
How Long Does it Take to Break in Hiking Boots?
Breaking in hiking boots is an essential step to ensure a comfortable and enjoyable hiking experience. New hiking boots often require some time to mold to the shape of your feet and soften the materials. The duration it takes to break in your hiking boots can vary depending on several factors.
Material and Construction
The material and construction of your hiking boots play a significant role in how long it takes to break them in. Leather boots, for example, tend to take longer to break in compared to synthetic materials. Leather boots are known for their durability and support, but they can be stiffer initially.
On the other hand, synthetic boots tend to be more flexible and require less time to break in.
Personal Fit and Comfort
The fit of your hiking boots also affects how long it takes to break them in. If you have chosen the right size and width for your feet, the break-in period may be shorter. However, if your boots are too tight or too loose, it may take longer for them to conform to your feet.
It is crucial to invest time in finding the right fit before embarking on a hike to avoid discomfort and potential foot issues.
Usage and Conditioning
Regular use and conditioning of your hiking boots can help expedite the break-in process. Gradually wearing your boots for shorter hikes or walks before tackling longer, more challenging trails can help your boots adjust to your feet more quickly.
Conditioning the leather portions of your boots with appropriate products can soften the material and make them more pliable.
Breaking in Tips
While there is no exact timeframe for breaking in hiking boots, there are several tips you can follow to expedite the process:
- Start by wearing your boots around the house or during short walks to gradually introduce them to your feet.
- Use thick hiking socks to cushion your feet and prevent blisters.
- Apply a leather conditioner or boot oil to soften the leather portions of your boots.
- Gradually increase the duration and difficulty of your hikes to allow your boots to mold to your feet.
- Listen to your feet and take breaks if you start to experience discomfort.
Remember, breaking in hiking boots is a process that requires patience. Rushing this process can lead to discomfort and foot problems during your hikes. Take the time to break in your boots properly, and you’ll be rewarded with a comfortable and enjoyable hiking experience.
Break-In Methods and Tips
Breaking in new hiking boots is essential to prevent discomfort, blisters, and potential injuries on the trail. Here are some effective methods and helpful tips to make the break-in process as smooth as possible.
Wear them around the house
One of the easiest and most common ways to break in hiking boots is to wear them around the house. This allows your feet to get accustomed to the boots while minimizing the risk of discomfort or blisters.
Start by wearing them for short periods and gradually increase the duration as your feet become more accustomed to the boots.
Use a boot stretcher
If your hiking boots feel too tight or snug, using a boot stretcher can help to expand the width of the boot. This tool is designed to gently stretch the material without causing any damage. Simply insert the stretcher into the boot and adjust it according to your comfort level.
Leave it overnight or for several hours to allow the material to stretch.
Try thicker socks
If your boots still feel uncomfortable, try wearing thicker socks. This can provide extra cushioning and reduce friction, which can help to prevent blisters. Look for hiking socks made from moisture-wicking materials to keep your feet dry and comfortable during your hikes.
Use moleskin and bandages
If you’re experiencing hot spots or friction points on your feet, applying moleskin or bandages can provide extra protection and alleviate discomfort. Simply place the moleskin or bandages over the affected areas before putting on your socks and boots.
This can help to reduce rubbing and prevent blisters from forming.
Waterproof before hitting the trail
Prior to your first hike, it’s important to waterproof your hiking boots. This can be done using a waterproofing spray or wax, which helps to keep your feet dry in wet conditions. Be sure to follow the manufacturer’s instructions for the specific product you choose, and allow the boots to dry completely before wearing them.
Start with short, easy hikes
When you’re ready to hit the trail, it’s best to start with short and easy hikes. This allows your feet to gradually adapt to the boots and prevents excessive strain or discomfort. As your boots continue to break in, you can gradually increase the length and difficulty of your hikes.
Remember, breaking in hiking boots takes time and patience. Rushing the process can lead to discomfort and foot problems during your hikes. By following these methods and tips, you’ll be well on your way to enjoying comfortable and pain-free adventures on the trail.
Signs Your Boots Are Broken In
Breaking in hiking boots is an essential step to ensure a comfortable and enjoyable hiking experience. It allows the boots to mold to the shape of your feet, reducing the risk of blisters and discomfort. But how do you know when your boots are properly broken in? Here are some signs to look out for:
Snug, not tight fit
One of the first signs that your hiking boots are properly broken in is that they fit snugly, but not too tight. Your feet should feel supported and secure, with just enough room for your toes to wiggle comfortably.
If your boots feel excessively tight or pinch your feet, they may not be fully broken in yet.
No slipping or heel lift
Another indication that your boots are broken in is when there is no slipping or heel lift while walking. When you wear properly broken-in boots, your heels should stay in place, and there should be minimal movement or friction between your feet and the boots.
This helps prevent blisters and discomfort.
No blisters or hot spots
A sure sign that your hiking boots are broken in is the absence of blisters or hot spots on your feet. Blisters are caused by friction between your skin and the boots, and they can be incredibly painful.
If you have been wearing your boots for a while and haven’t experienced any blisters or hot spots, it’s a good indication that they are well broken in.
Comfortable flex points
When hiking, your boots need to flex and bend with your feet to provide maximum comfort and movement. A properly broken-in boot will have flex points that align with the natural movement of your feet. If you notice that the boots are no longer stiff or restrictive and allow for easy flexing, then they are likely broken in.
Remember, breaking in hiking boots is a gradual process, and it may take some time for them to fully conform to your feet. It’s important to wear them for shorter hikes or around the house before embarking on longer treks to ensure that they are comfortable and properly broken in.
Caring for Your Boots Post-Break-In
After you have successfully broken in your hiking boots, it’s essential to continue taking care of them to ensure their longevity and performance on future hikes. Here are some important steps to follow when caring for your boots post-break-in:
Clean after each use
After each hike, take the time to clean your boots properly. Remove any dirt, mud, or debris that may have accumulated during your outdoor adventures. Use a soft brush or cloth to gently scrub away the dirt. Pay particular attention to the seams and crevices where dirt can easily get trapped.
Allow boots to dry fully
Moisture can be detrimental to the lifespan of your boots. After cleaning, make sure to let your boots dry completely before storing them. Avoid placing them near direct heat sources, as this can cause the leather to dry out and crack. Instead, let them air dry in a well-ventilated area.
Store properly
Proper storage is crucial to maintaining the shape and condition of your boots. Store them in a cool, dry place away from direct sunlight. Avoid storing them in a tightly sealed container, as this can lead to the growth of mold and mildew.
Consider using a boot tree or stuffing them with newspaper to help maintain their shape.
Inspect for damage
Regularly inspect your boots for any signs of damage or wear and tear. Check the soles for any punctures or excessive wear. Examine the stitching and seams to ensure they are intact. If you notice any issues, it’s best to address them promptly to prevent further damage.
Re-waterproof as needed
Over time, the waterproofing on your boots may start to wear off. To maintain their water resistance, reapply a waterproofing treatment as needed. Follow the manufacturer’s instructions for the specific product you are using, and ensure that your boots are clean and dry before applying.
By following these care tips, you can extend the lifespan of your hiking boots and continue to enjoy their comfort and performance on many more adventures to come.
Conclusion
Breaking in your new hiking boots properly is a crucial process for comfort and performance on the trail. Allowing adequate time to let the materials mold to your feet will prevent painful blisters and irritation. Start by wearing your boots around the house to identify any pressure points.
Then, begin with short, simple hikes before taking them out for a backcountry trek. Keep your feet happy by caring for your boots during and after the break-in period. With patience and the right techniques, your new hiking boots will soon feel like a natural extension of your foot, ready to carry you to mountain summits and forest waterfalls!