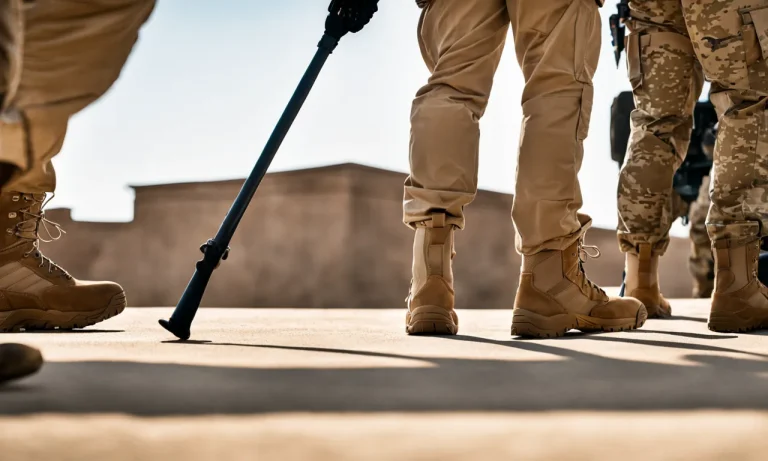
Combat boots are a classic footwear choice that offer durability, traction, and style. If you have a new pair of combat boots, you may be wondering how to properly tie them to get the best fit and support. Tying combat boots requires a specific technique that secures them firmly to your feet.
If you’re short on time, here’s a quick answer to your question: the key steps are loosening the laces completely, placing your foot comfortably in the boot, tightening the laces from the bottom up, and finishing with a secure knot at the top.
Continue reading below for step-by-step instructions on how to tie combat boots for a perfect fit every time.
Things You’ll Need
Combat boots
Before you start learning how to tie combat boots, you will need a pair of combat boots. These boots are specifically designed for military personnel and are known for their durability and ruggedness. When choosing combat boots, make sure they are the right size and provide proper support for your feet.
Look for boots made from high-quality materials that can withstand harsh conditions.
Boot laces
Next, you will need boot laces. Boot laces come in various lengths and materials, so it’s important to choose the right ones for your combat boots. Opt for laces that are long enough to allow you to tie a secure knot without being too tight or too loose.
It’s also a good idea to select laces that are strong and resistant to wear and tear, as they will be subjected to constant tension and friction.
If you’re unsure about what type of boot laces to get, consider checking out reputable outdoor gear websites like REI (www.rei.com) or military supply stores like US Patriot Tactical (www.uspatriottactical.com).
These websites offer a wide range of boot laces specifically designed for combat boots and can provide helpful guidance on choosing the right ones for your needs.
Prepare the Laces
Before you start tying your combat boots, it’s important to prepare the laces properly. This will ensure a secure and comfortable fit. Here are two essential steps to follow:
Loosen the laces completely so there is no tension
First, make sure to loosen the laces completely. This means removing any tension from the laces by pulling them out of any eyelets or hooks. By doing this, you’ll have more control over the tightness of the laces when you tie them.
Ensure the laces are untied and free from knots
Next, check that the laces are untied and free from any knots. It’s important to start with a clean slate to ensure a proper and secure tie. If there are any knots, untie them carefully, making sure not to damage the laces in the process.
Remember, preparing the laces properly is the foundation for tying your combat boots correctly. By following these steps, you’ll be ready to move on to the next stage of securing your boots.
Put Your Feet in the Boots
Slide your foot comfortably into the boot, making sure your heel is settled in the back
When putting on combat boots, it’s important to start by sliding your foot comfortably into the boot. Make sure your heel is settled in the back of the boot, as this will provide stability and prevent your foot from sliding around.
Take your time to ensure that your foot is positioned correctly before moving on to the next step.
Wiggle your toes to make room for them
Once your foot is in the boot, take a moment to wiggle your toes. This will help create some extra room for them and ensure that they are not cramped or uncomfortable. It’s important to have enough space for your toes to move freely, as this will prevent any discomfort or potential foot problems.
If you find that your toes are feeling cramped, you may need to adjust the laces or consider a different size of boot.
For more information and tips on how to properly tie combat boots, you can visit www.military.com. They have a comprehensive guide on military footwear and provide expert advice on how to properly fit and tie combat boots.
Tighten the Bottom Laces
When it comes to tying combat boots, it’s important to start at the bottom near your toes. This ensures a secure fit and prevents your foot from sliding around inside the boot. Begin by threading the laces through the bottom eyelets, making sure they are evenly distributed.
Start tightening the laces at the bottom near your toes
Once the laces are threaded through the bottom eyelets, start tightening them. Pull each lace snugly from side to side in a crisscross pattern. This helps to distribute the tension evenly and creates a secure and comfortable fit.
Be sure to pull the laces tight enough to provide support, but not so tight that they cut off circulation or cause discomfort.
Pull the laces snugly from side to side in a crisscross pattern
Working your way up the boot slowly is key to achieving a proper fit. As you tighten the laces, continue to crisscross them, pulling them snugly from side to side. This technique ensures that the boot is secured tightly around your foot and ankle, providing stability and reducing the risk of blisters or discomfort.
Remember, it’s important to take your time when tightening the laces. Rushing through the process may result in an uneven fit or a lack of support. So, be patient and make any necessary adjustments along the way.
For more detailed instructions on how to tie combat boots, you can visit military.com. They provide a comprehensive guide with step-by-step visuals to help you achieve the perfect fit.
Tighten the Top Laces
Tying combat boots properly is essential for providing support and stability during physical activities and ensuring a comfortable fit. The top laces play a crucial role in securing the ankle and heel, preventing any unnecessary movement or blisters.
Here is a step-by-step guide on how to tighten the top laces of combat boots:
Tighten the laces across the ankle region
Start by pulling the laces tightly across the ankle region. This step is important as it helps to keep the ankle secure and prevents any slippage while walking or running. You can use your fingers or a lace lock to hold the tension in place.
Ensure they are snug but not too tight
While tightening the top laces, it is crucial to find the right balance between snugness and comfort. If the laces are too tight, they may restrict blood flow or cause discomfort. On the other hand, if they are too loose, they will not provide adequate support.
Adjust the tension until you find a comfortable fit that ensures stability without causing any discomfort.
This locks the heel in place
One of the main purposes of tightening the top laces is to lock the heel in place. A properly tightened lace across the ankle region prevents the heel from slipping up and down while walking or engaging in physical activities.
This not only enhances stability but also reduces the risk of blisters and injuries.
Remember, it may take a few tries to find the perfect balance of tightness for your combat boots. Experiment with different tensions and lace techniques until you find what works best for you. Practice makes perfect, and soon you’ll be able to tie your combat boots with confidence!
Tie the Bow
Tie the laces together at the top in a secure bow
Once you have laced up your combat boots, it’s time to tie the bow. Start by crossing the left lace over the right lace, creating an “X” shape. Then, take the left lace and loop it under the right lace, pulling it through the hole. Finally, pull both laces tight to secure the bow.
Make sure the bow is tight enough to keep your boots securely fastened throughout the day, but not so tight that it cuts off circulation to your feet.
Double-knot them for extra hold
If you want to ensure that your combat boots stay securely tied all day long, consider double-knotting them. After tying the initial bow, take one of the loops and cross it over the other loop. Then, pull it through the hole to create a second knot.
This will provide extra hold and prevent your laces from coming undone, even during intense physical activity or long days on your feet.
Tuck laces inside boots or wrap around back
After tying your combat boots, you have a couple of options for what to do with the remaining length of the laces. One option is to tuck the laces inside the boots, ensuring that they stay out of the way and don’t get caught on anything.
Another option is to wrap the laces around the back of the boots, creating a neat and tidy look. Choose whichever option feels most comfortable and secure for you.
For more detailed instructions and visuals on how to tie combat boots, you can visit www.wikihow.com. They have a step-by-step guide with helpful images to assist you in mastering the art of tying combat boots.
Conclusion
Tying combat boots properly is easy once you know the technique. By fully loosening laces first, tightening from bottom to top, and finishing with a sturdy knot, you can achieve a secure, comfortable fit.
Snugly tied combat boots will stay firmly on your feet and provide arch support, traction, and style wherever you wear them.